SQL Server Express edition doesn’t include SQL Agent, and even on editions that do, there are times when scheduling a query at the operating-system level is simply the more practical option (DBA won’t let you access SQL Agent, for example).
Windows Task Scheduler paired with SQLCMD fills that gap: it lets you run a .sql script on a recurring schedule, using either Windows Integrated Security or a SQL login, with no dependency on the SQL Server Agent service.
This post walks through setting up a scheduled, unattended query execution using a batch file, SQLCMD, and Task Scheduler.
Before you automate anything destructive: if the task you’re scheduling includes
DELETE,UPDATE,DROP, or any other destructive operation, make sure you have a backup first. Test the logic with aSELECTin place of theDELETE(or wrap it inBEGIN TRANSACTION/ROLLBACK TRANSACTION) to validate the results before you let it run unattended. An unattended job that runs every 15 minutes will happily repeat a mistake just as reliably as it repeats a success.
Step 1: Create the batch file and the query file
Start by creating two files in a folder of your choosing (permissions allowing):
- A Windows batch file that calls
SQLCMD. - The actual query that
SQLCMDwill execute.
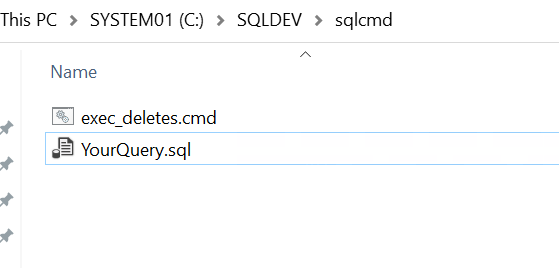
Here’s an example of what each file contains.
exec_deletes.cmd
@echo off
sqlcmd -S ServerName\InstanceName -E -i "C:\SQLDEV\sqlcmd\YourQuery.sql" -o "C:\SQLDEV\sqlcmd\Output_%date:~-4,4%%date:~-10,2%%date:~-7,2%.log"
In this command, the -E switch tells SQLCMD to connect using Integrated Security — meaning the Windows user account configured in Task Scheduler (see Step 2) needs adequate permissions in the target database. You can also connect with the -U and -P switches to use a standard SQL Server login, but that approach exposes the username and password in plain text, so Integrated Security is the safer default.
YourQuery.sql
USE [database]

DELETE FROM [table] WHERE OperationID = 0 AND DateTimeColumn < DATEADD(DAY, -15, GETUTCDATE());
Step 2: Create a new task in Task Scheduler
Open Windows Task Scheduler and create a new task.
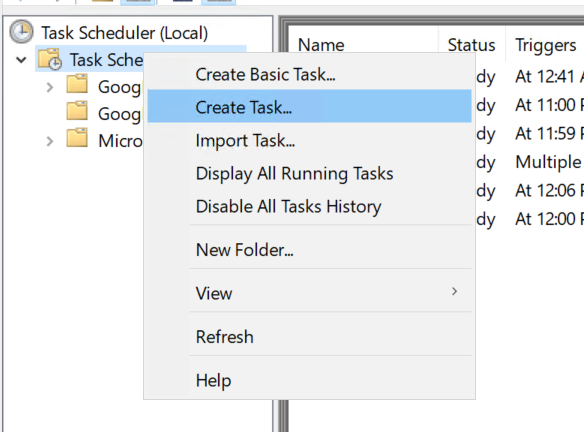
Step 3: Configure the General tab
On the General tab, there are two settings worth calling out (highlighted below):
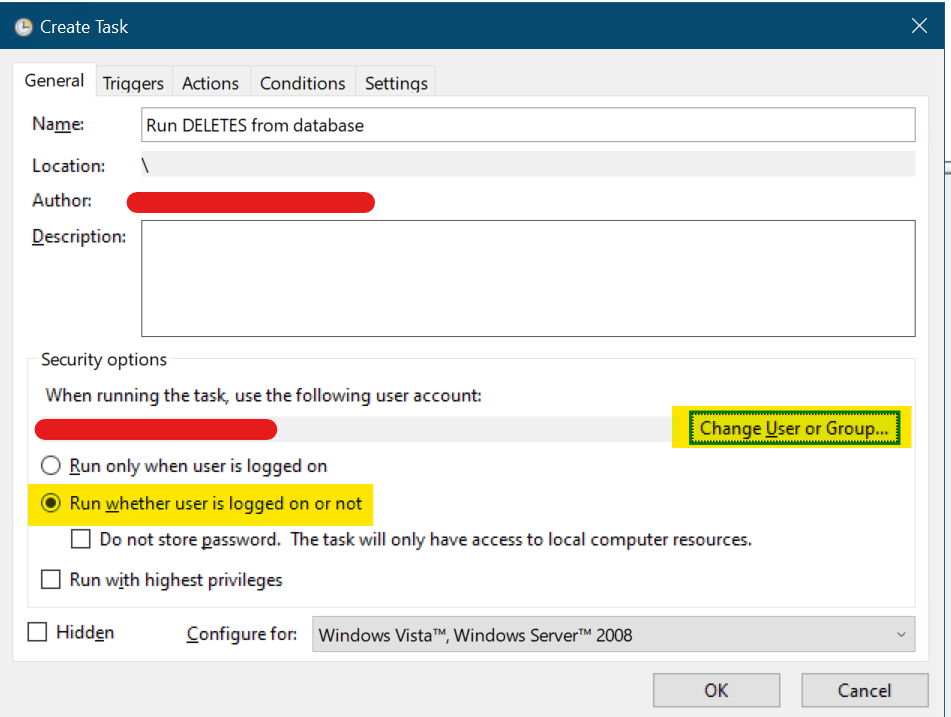
Change User or Group — enter a valid Windows login with the appropriate privileges in the SQL Server database to execute the query, as noted in Step 1.
Run whether user is logged in or not — select this option for unattended execution, unless you specifically want the task to run only while you’re logged in to the server.
Step 4: Configure the Triggers tab
Go to the Triggers tab and click New to set up the execution schedule.
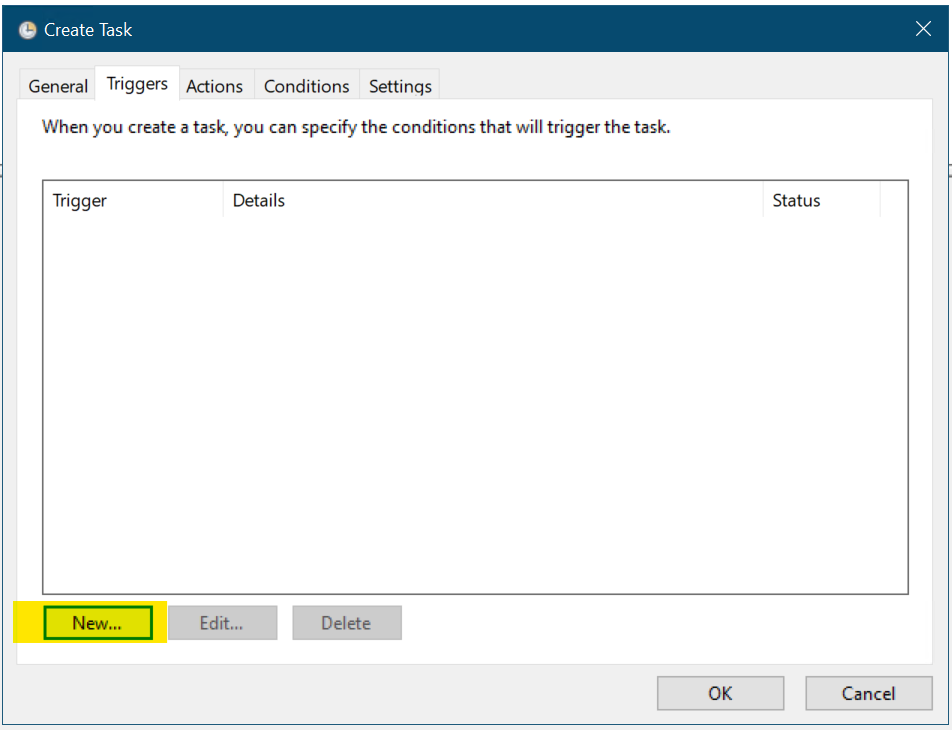
In the New Trigger window, set the schedule — again, the key settings are highlighted below:
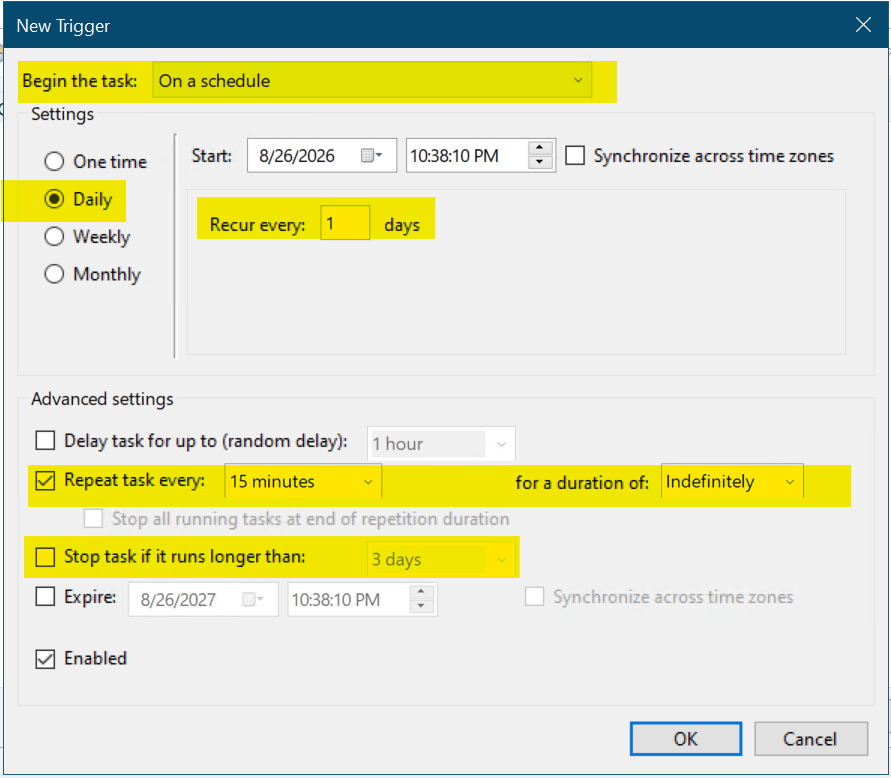
In this example, the task runs On a schedule, Daily, Recur every 1 days, with Repeat task every 15 minutes — Indefinitely. Adjust these values to fit your own requirements.
It’s also worth setting the Stop task if it runs longer than option based on how long you expect the query to take — this prevents overlapping runs if a job ever hangs.
Make sure the trigger is Enabled, then click OK.
Step 5: Configure the Actions tab
Move to the Actions tab and click New.
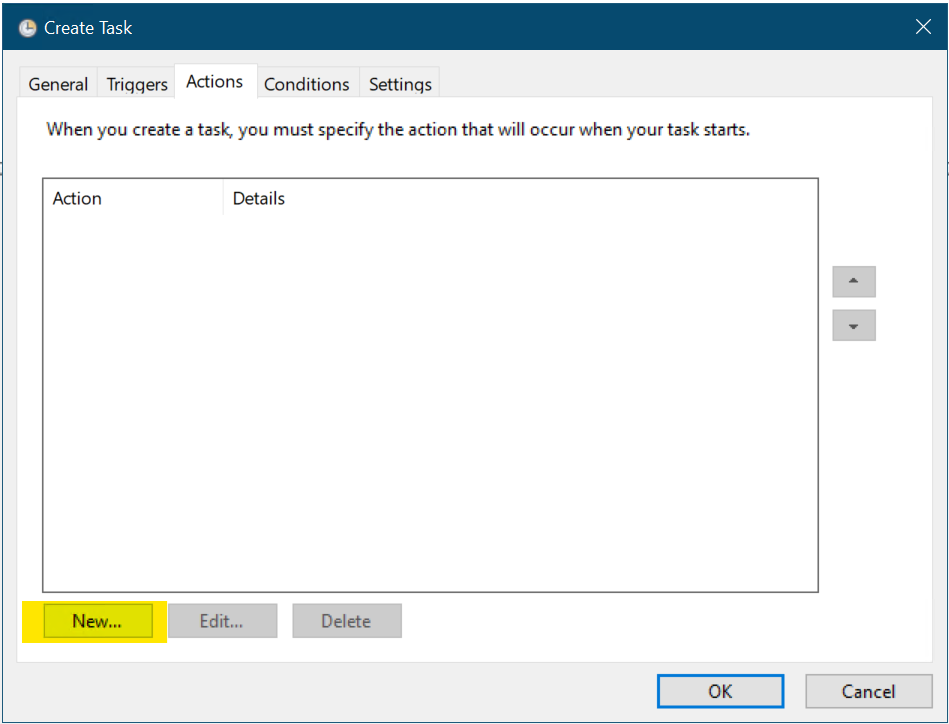
Set the action to Start a program, and point it at the batch file created in Step 1 (highlighted below).
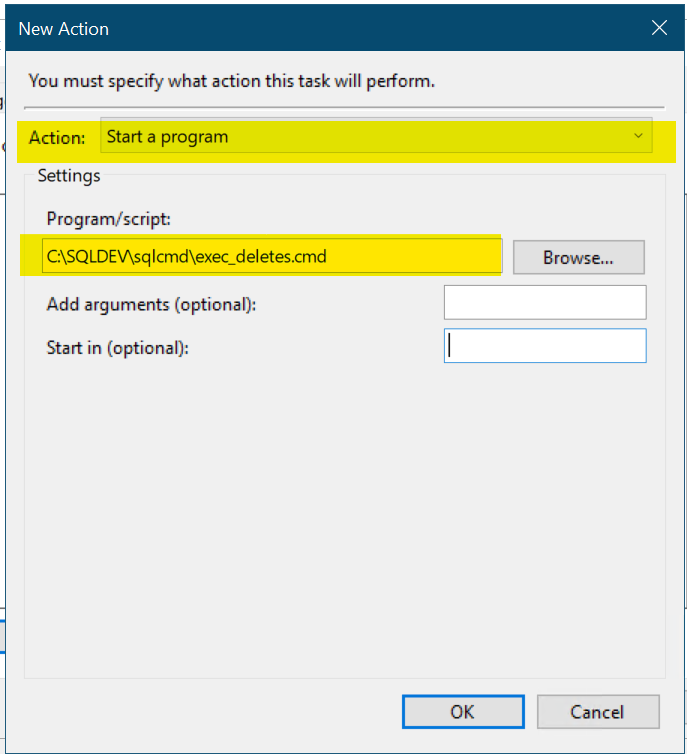
Click OK to save the new action.
Step 6: Review Conditions and Settings, then save
Review the Conditions and Settings tabs — in most cases, the defaults are fine and the options are self-explanatory (power conditions, network availability, retry behavior, and so on).
Once you’re happy with the configuration, save the task.
Wrapping up
That’s the whole setup: a batch file that calls SQLCMD against a .sql script, and a Task Scheduler job that runs it on whatever cadence you need. It’s a lightweight way to automate query execution outside of SQL Server Agent —useful for Express edition, or simply when you’d rather keep the scheduling at the Windows level.
As with any automated, unattended process touching production data: back it up first, test with a non-destructive SELECT or a transaction you can roll back, and only then let the schedule run on its own.